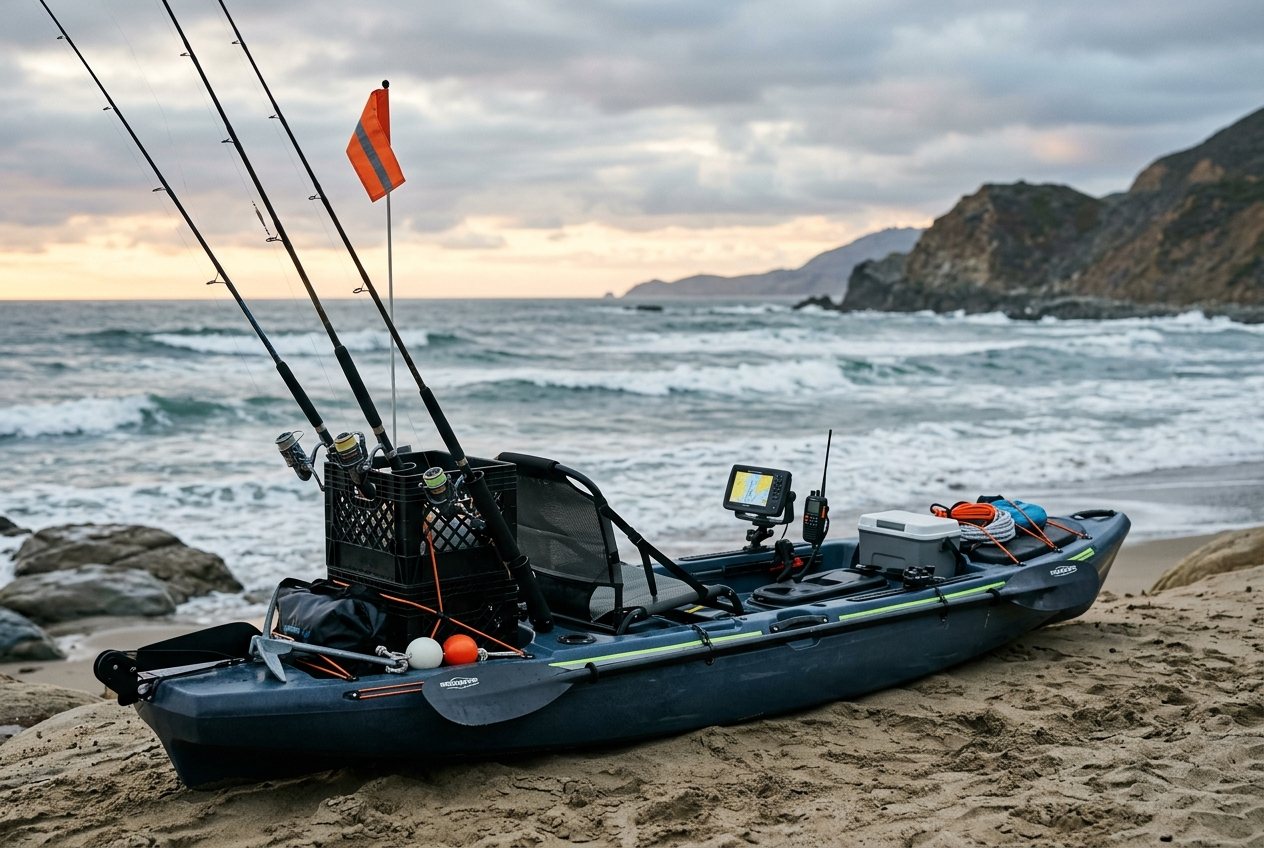
Rigging a Kayak for Ocean Fishing: A Practical Starting Point
Why ocean rigging is a different problem
A kayak set up for a calm lake will not necessarily hold up to surf launches, tidal current, and salt spray. Ocean fishing adds forces and failure modes that flat water rarely tests: gear ripped loose by a wave, hardware seizing from corrosion, hatches taking on water when a wake breaks over the bow. Before buying anything, it helps to think of rigging as a system built around three questions: what stays attached when the kayak gets knocked around, what keeps salt and water out of places it shouldn't be, and what can you actually reach and operate one-handed while managing a rod and a paddle.
This guide walks through the core decisions in a sensible order: rod holders, anchor trolley, hatches and dry storage, and the smaller hardware choices that tend to get overlooked until they fail.
Start with rod holders, but plan for movement
Most fishing kayaks come with molded-in rod holders behind the seat. They're fine for trolling or for stowing a rod while you paddle, but they are usually a poor choice for actively fishing in open water, because the rod sits too far behind you to control quickly when a fish hits or when you need to clear a line fast.
Flush-mount or rail-mount rod holders positioned within easy reach of the seat solve this. When choosing placement, sit in the kayak on flat ground first and mimic the motion of casting, setting a hook, and swinging a rod across your body. Ocean conditions mean you may be doing this while the kayak is rocking, so holders should be close enough that you're not reaching or twisting to use them.
A practical note specific to saltwater: any hardware you mount should be rated for marine use or at minimum stainless steel or corrosion-resistant plastic. Standard steel hardware will rust and can seize within a season of regular saltwater exposure, making future adjustments difficult.
Build an anchor trolley you can run in current
An anchor trolley is a length of cord and pulleys that lets you adjust where your anchor line attaches along the kayak's side, from bow to stern, without leaving your seat. On a lake this is a convenience. In ocean inlets and along the coast, where current and wind can pull from different directions at once, it is close to essential. Anchoring from a fixed point on a kayak in current can turn the boat sideways to waves or current quickly, which is uncomfortable at best and a stability risk at worst.
A basic trolley runs from a pulley near the bow, along one side of the kayak, to a pulley near the stern, then back to a cleat or ring within reach of the seat. The anchor line itself clips onto the trolley loop with a ring or carabiner, so you can slide the attachment point forward or aft to change the angle you sit at relative to the current or swell.
When rigging the trolley, keep the line taut enough that it doesn't sag into the water or catch on your paddle, and use a stainless ring or low-friction ring rather than a plain knot at the attachment point, since you'll be sliding it back and forth often. Test the full range of motion before you're relying on it offshore, sitting on the water in calm conditions first.
Hatches and dry storage: keep water out, not just gear in
Ocean kayak fishing means spray comes over the deck regularly, and the occasional wave will break across the bow during a surf launch. Hatches that are only splash-resistant, common on recreational kayaks, will eventually let water into your hull or storage compartments. If you're outfitting a kayak specifically for ocean use, check that hatch covers seal fully, not just clip down loosely, and consider a waterproof deck bag or dry bag for anything that can't get wet, like phones, spare tackle boxes, or first aid supplies.
It's worth keeping a short mental list of what genuinely needs to stay dry versus what can tolerate occasional spray. Rigging every compartment to be fully waterproof is often unnecessary and can complicate access; the goal is knowing which hatch or bag is your dry one, and treating it accordingly.
Small hardware that gets overlooked
A few details tend to get skipped by first-time riggers but matter more offshore than on a lake:
**Leashes on gear that can't be replaced easily.** Paddles, rods, and pliers can all go overboard in a rolling wave or a hard hookset. A simple coiled leash on each is inexpensive insurance against losing gear in conditions where retrieving it isn't realistic.
**Bilge pump or hand pump access.** If your kayak takes on water, whether from a wave, a leak, or self-swamping during a re-entry, you want a pump within reach, not stowed in a hatch you'd need to open mid-crisis.
**A stainless or marine-rated deck plate for wiring**, if you're running any electronics like a fish finder. Saltwater will find its way into gaps that seem sealed on a lake.
Putting it together
There's no single correct rigging layout, since it depends on your kayak's hull design, where you fish, and how you like to sit and cast. But the ocean-specific priorities stay consistent across setups: keep critical hardware within reach, use corrosion-resistant materials throughout, build an anchor trolley that works in current, and know exactly which storage is genuinely waterproof. Get those decisions right before your first launch, and the rest of your setup becomes a matter of preference rather than survival.